Mastering the Pull: How to Pull Even Walls on the Wheel
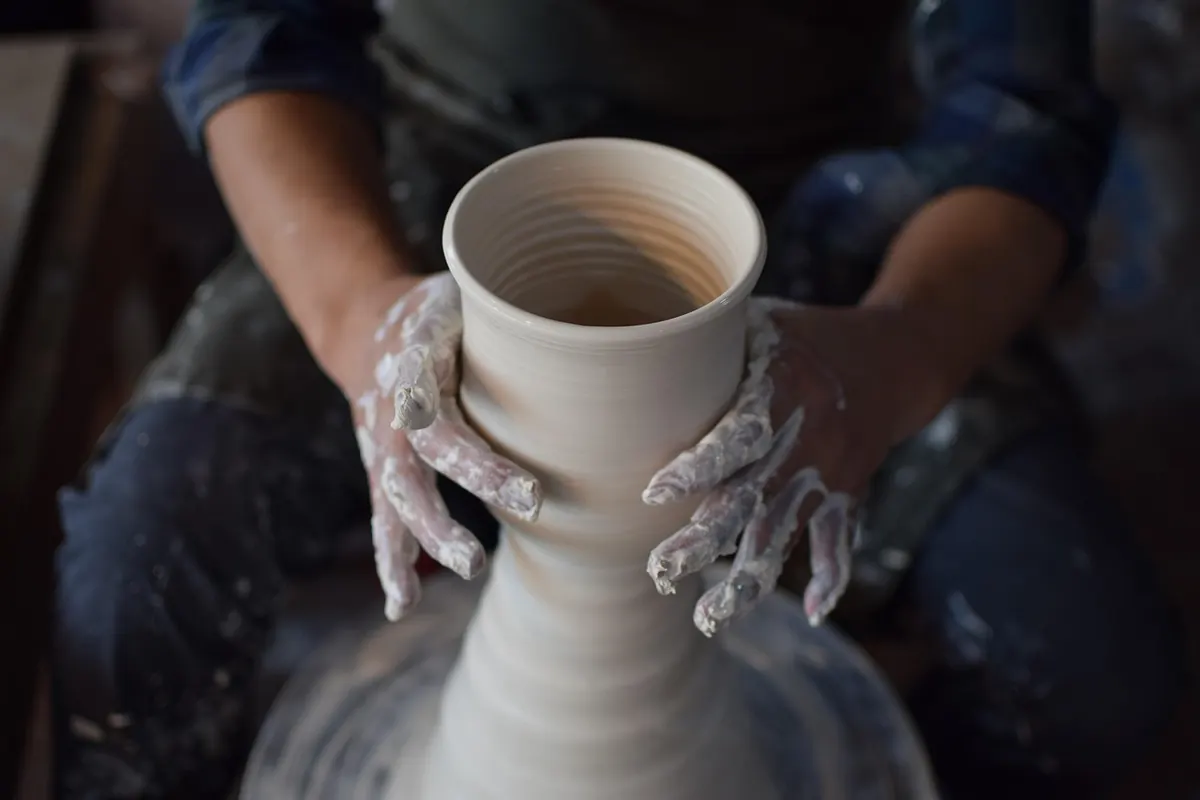
A cylinder that rises in one smooth movement looks like nothing much is happening. It is. What you are watching is clay being moved in a controlled amount, at a controlled speed, by two hands that stay close together and a body that stays still. Nothing about it depends on muscle.
Even walls matter more than height when you are learning. A pot with consistent thickness dries evenly, survives the kiln, feels good in the hand and looks lighter than it is. Get the walls right and tall forms follow almost on their own.
Why Walls Go Uneven
Almost every wobbly, heavy-bottomed, thin-topped pot traces back to one of four habits. One hand leads the other, so the clay is stretched on one side and squeezed on the other. The pull is too long, dragging clay over a distance it cannot support. There is so much water on the surface that the wall goes slick and slumps. Or the pot was never properly centred, and every pass amplifies that first mistake.
None of these are strength problems. They are timing problems, and they usually get fixed by slowing down and moving less clay per pass.
Set Up Before You Pull
Pulling is the easy part. Everything before it decides whether the pull will work.
- Centre properly and cone two or three times. The clay should feel uniform, with no hard patches or soft spots lurking near the base.
- Open the ball down to about a centimetre off the bat, keeping the floor flat and the same thickness across.
- Compress the floor from the centre outwards with a rib or firm fingertips. This closes the clay surface and makes S-cracks far less likely later.
- Sponge the worst of the water off, but keep the rim damp. A pot sitting in a puddle will not hold a wall.
- Sit with your elbows braced against your thighs or hips. A floating arm moves at its own speed, and the wall will show it.
The Grip: Squeezing, Not Dragging
Right-handed throwers work with the right hand inside the pot and the left hand outside. Reverse it if you throw left-handed.
The inside hand does the pushing. Rest your middle finger against the inside wall with the palm turned slightly away from you, and use your thumb, braced across the rim, to govern the pressure. The outside hand only supports: heel of the hand or the flat of the fingers against the outside wall, following the push rather than competing with it.
Think about the clay between the two surfaces rather than about the hands themselves. The wall is squeezed upward, the way you squeeze a pip from a lemon. If you feel clay being dragged along the surface instead of lifted, you are pressing too hard or climbing too fast.
Keep the distance short
The gap between your inside finger and your outside support is the wall thickness. If you can see daylight between your hands, you have opened a gap that the clay will happily fill by going thin. Keep the hands close, almost touching, and let the wheel do the work.
Pull in Stages, Not in One Go
A single long pull from base to rim is where most walls lose their evenness. Work in overlapping bands instead, roughly three to five centimetres at a time.
- Begin the first pull about two centimetres above the wheel head. This is the pull that moves the most clay, so give it room.
- Close the hands slightly inward as they rise, so the wall thins gradually rather than suddenly.
- Overlap each following pull by about a third of its length. Overlapping is what keeps the thickness continuous.
- Slow the wheel as you climb. The upper wall needs accuracy, not momentum.
- Aim for three or four pulls per pot. The first does the heavy work; the last two refine and thin.
- Finish by compressing the rim between thumb and forefinger or with a chamois, pulling it very slightly upward as you go.
Add water only when the clay actually needs it. Most pots are ruined by a wet wall rather than a dry one, and a damp sponge pressed against the outside is usually enough.
Reading the Wall as You Work
You do not need a gauge for most of this. The wall tells you what it is doing if you pay attention.
Feel. Pinch the rim gently between thumb and forefinger. It should feel like a sturdy piece of card, not like paper and not like a brick.
Listen. The pitch of the clay changes as the wall thins. When the note rises sharply, stop pulling.
Mark your needle tool. Nick the shaft with your fingernail at your target thickness — six to eight millimetres is a reasonable wall for a mug. Push it into the wall and see where the mark sits.
Cut a pot in half. This is the single most useful thing you can do for your throwing. Let a cylinder firm up to leather-hard, cut it vertically, and look at the section. The base will be heavier than you think and the rim thinner. Seeing it once is worth a dozen good intentions.
Common Faults and Their Fixes
- Spiralling or thin patches: uneven pressure from one hand. Slow the wheel and make more passes with less pressure each time.
- Heavy base, thin rim: starting the pull too high. Begin closer to the wheel head and let the first pull do the most work.
- Flaring, bell-mouthed rims: hands drifting outward as they climb. Keep them parallel, tapering very slightly inward.
- A soft, slumping wall: too much water. Sponge the outside, leave the pot for a few minutes, then continue.
- Rim wobble: wheel speed too high near the top, or unbraced arms. Both are easy to correct.
- Collapse: moving too much clay in a single pull. Do less, more often.
Where to Spend Your Practice
Throw the same simple cylinder, from the same weight of clay, over and over. Repetition is what turns a technique you understand into one your hands know. Aim for a shape, not a height: a fifteen-centimetre pot with even walls is worth more than a twenty-five-centimetre pot with a collapsed rim, and it will teach you more.
Keep a notebook beside the wheel. Note the clay weight, roughly how many pulls you used, and what went wrong. Patterns show up quickly — most potters discover that their best pots come from the sessions where they barely added any water.
Cover finished pots loosely so they dry slowly and evenly, and don't leave a wet rim exposed to a draught. If your wrists or shoulders ache after a session, ease off and let them recover; persistent pain is worth having looked at rather than throwing through.
Then throw another one. Even walls are not a trick you learn once. They are a habit you build, pull by pull, until your hands stop negotiating and simply do it.
Photo: jeenakim / Pixabay